|
| |
Morrie's Windscreen
| Album Home
| Journal |
Arrival in Texas |
Repairs and Upgrades |
| Dash Pad Replacement |
Rocker Panel Replacement |
Engine Refresh |
Here's approximately how it went...
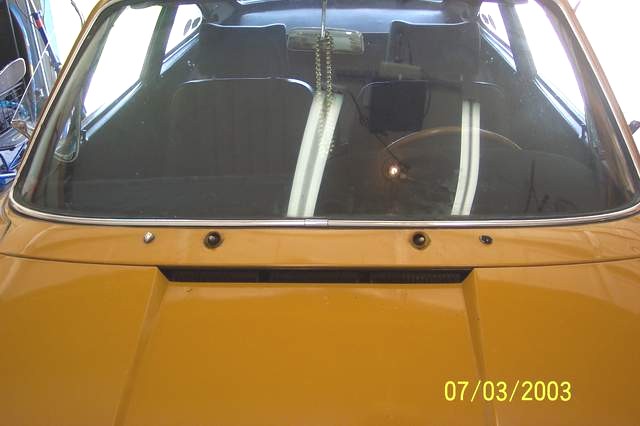
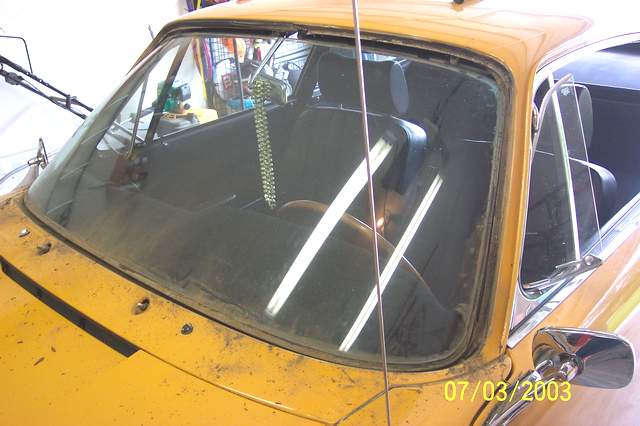
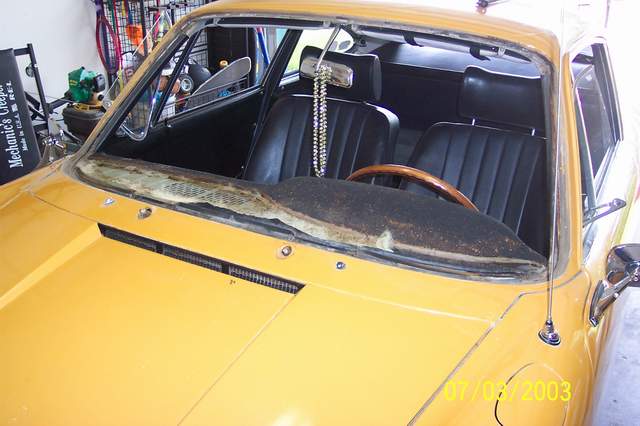
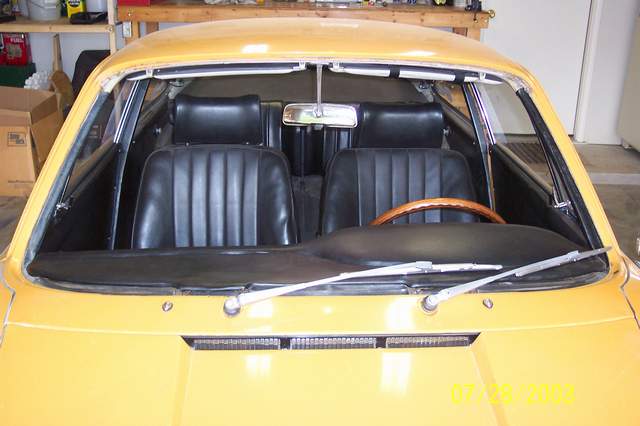
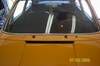
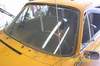
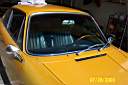
 Here we have a picture of the Windscreen before removal. The wipers are parked on the right, which I plan to switch back to original, and the Windscreen seal is very badly checked and leaks severely. We also hope to cure some of the wind noise which seems to be coming from around the windscreen. The noise is so bad that it is impossible to cary on a conversation at highway speeds even with the side glass up.
 The first step was to remove the wipers to gain easy access to the seal and begin the process of removing the wiper motor. Removal of the motor is not necessary to reverse the park position of the blades but my motor runs very slowly and one of the wiper mount ends is frozen to the shaft, making the monting bold pivot with the wiper, preventing it from staying tight. The first step was to remove the wipers to gain easy access to the seal and begin the process of removing the wiper motor. Removal of the motor is not necessary to reverse the park position of the blades but my motor runs very slowly and one of the wiper mount ends is frozen to the shaft, making the monting bold pivot with the wiper, preventing it from staying tight.
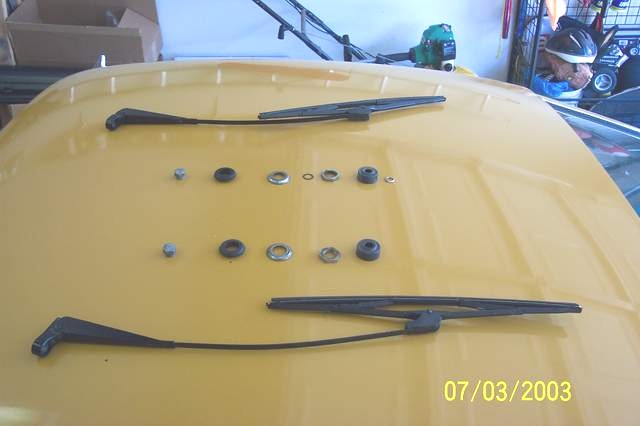
 Here are the wiper arms and hardware removed from the car. These will be disassembled, stripped, and repainted in silver to approximate the original look of the car. Here are the wiper arms and hardware removed from the car. These will be disassembled, stripped, and repainted in silver to approximate the original look of the car.
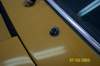 The Washer jets are also shot. They no longer seat firmly, allowing them to spin. The bases are also cracked and weathered. New jets will replace the old as part of this project. The Washer jets are also shot. They no longer seat firmly, allowing them to spin. The bases are also cracked and weathered. New jets will replace the old as part of this project.
 Here you can see the start of removing the windscreen. As the seal is to be disposed of, I am cutting it to remove the windscreen. The idea is to cut along the seal parallel to the flat surface of the windscreen. This will allow the glass to still be supported by the seal from the back and facilitate easy low stress removal of the glass. Here you can see the start of removing the windscreen. As the seal is to be disposed of, I am cutting it to remove the windscreen. The idea is to cut along the seal parallel to the flat surface of the windscreen. This will allow the glass to still be supported by the seal from the back and facilitate easy low stress removal of the glass.
 The job gets rather messy as the old seal is cut away. You can see in this picture how the glass has been exposed up to its edge while still resting on the seal. The job gets rather messy as the old seal is cut away. You can see in this picture how the glass has been exposed up to its edge while still resting on the seal.
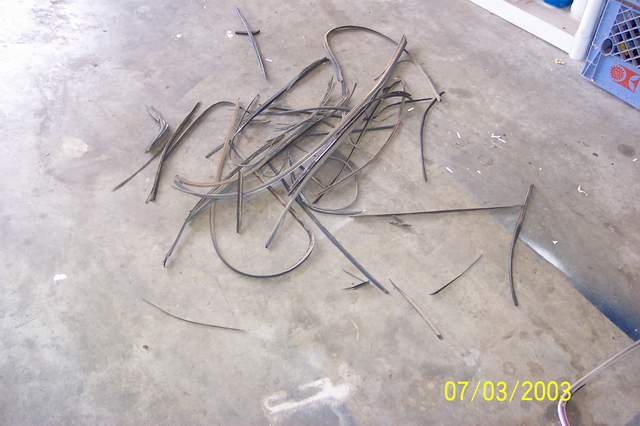
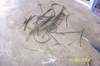 This is the removed debris from the seal. Its a combination of rotted rubber, dirt, and various sealing compounds that were used over the years to attemp to seal the glass without removing the seal. They didn't work very well. This is the removed debris from the seal. Its a combination of rotted rubber, dirt, and various sealing compounds that were used over the years to attemp to seal the glass without removing the seal. They didn't work very well.
 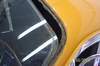 Here you can see the windscreen is free and resting on the frame. Lifting it out is a two person job to insure there is no unnecessary strain placed on the old glass, which can become brittle over time and may snap unexpectedly. Here you can see the windscreen is free and resting on the frame. Lifting it out is a two person job to insure there is no unnecessary strain placed on the old glass, which can become brittle over time and may snap unexpectedly.
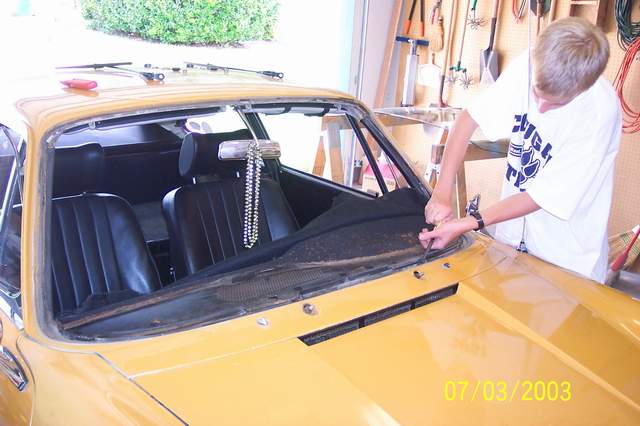
 Here the glass is completely removed from the car and can be seen sitting on the saw horses behind my son Jeff. Here you can see Jeff beginning the process of cleaning the seal area in preparation of reinstallation of the windshield. This is the time to repair any surface rust or worse which may have occurred over the years from the invisible leaks in the windscreen. Here the glass is completely removed from the car and can be seen sitting on the saw horses behind my son Jeff. Here you can see Jeff beginning the process of cleaning the seal area in preparation of reinstallation of the windshield. This is the time to repair any surface rust or worse which may have occurred over the years from the invisible leaks in the windscreen.
 This picture clearly shows the severely deterioriated condition of the Dash Pad. This is common on the early cars after 35 years of exposure to the sun through glass which offered little or no UV protection. The pad will be replaced with a good used one acquired from an E-Bay auction. This picture clearly shows the severely deterioriated condition of the Dash Pad. This is common on the early cars after 35 years of exposure to the sun through glass which offered little or no UV protection. The pad will be replaced with a good used one acquired from an E-Bay auction.

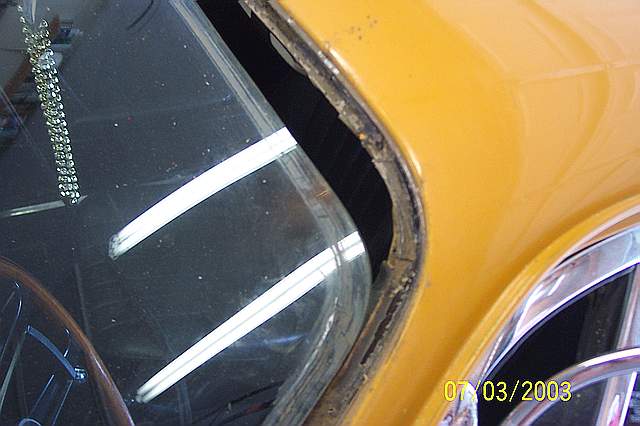
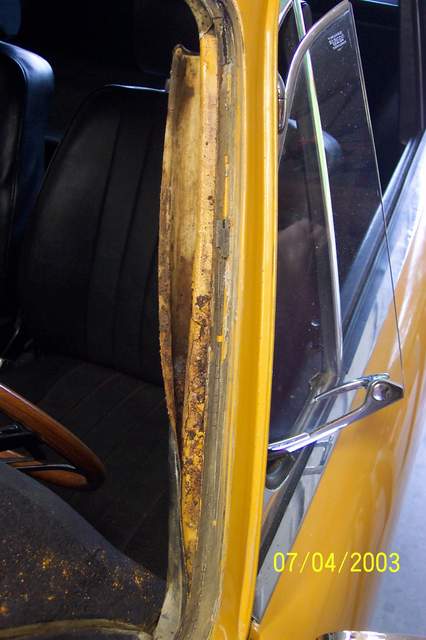
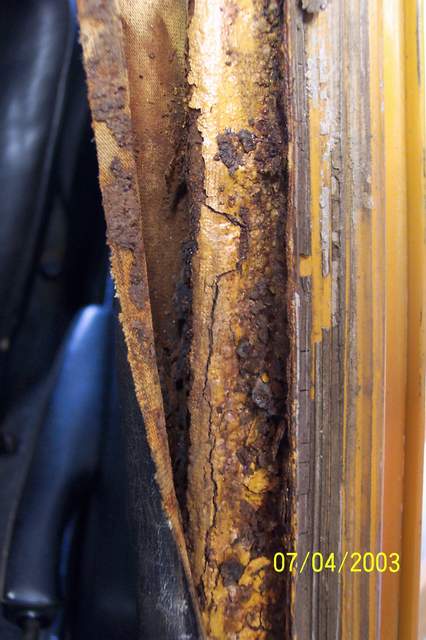
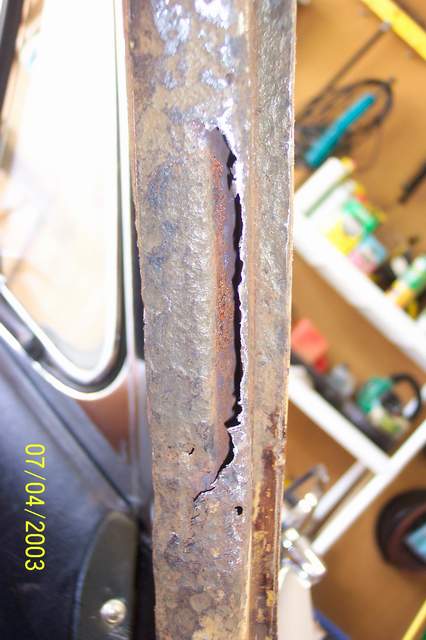
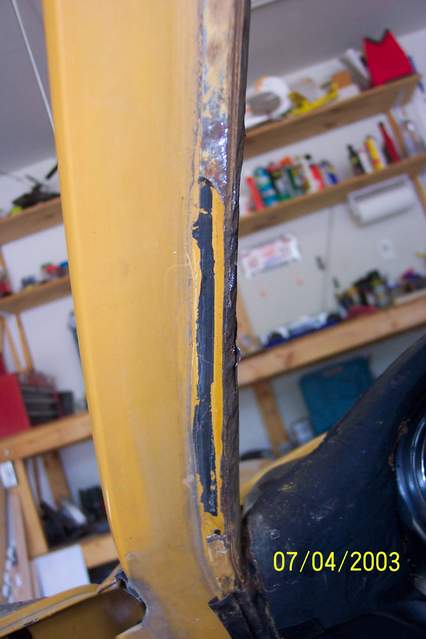
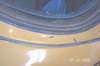
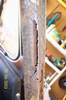
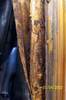 While there was no significant rust in the lower corners of the window frame as is the case with a leaking seal, moisture had found a path into the front drivers side A pillar. It was captured behind the vynal covering and festered there for who knows how many years to produce what we see here.
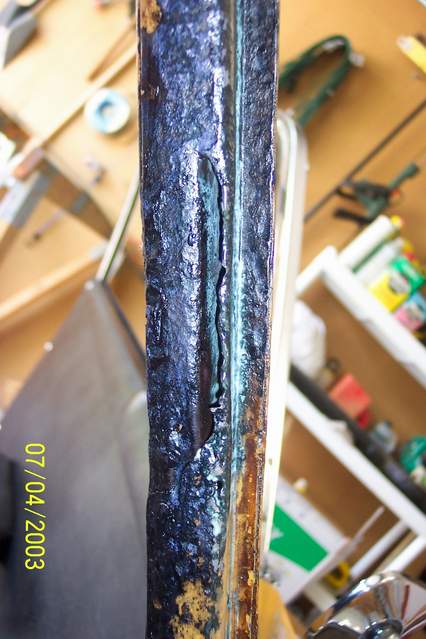
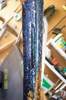 Here you can see the area has been thoroughly cleaned and treated with a rust converter. Here you can see the area has been thoroughly cleaned and treated with a rust converter.
 Finally, new metal is installed and welded in place. The pillar was then re-wrapped with new vynal to produce a clean, refurbished look. Finally, new metal is installed and welded in place. The pillar was then re-wrapped with new vynal to produce a clean, refurbished look.
 Aircraft Stripper and a wire brush were used to strip the painted wiper arms to bare metal and polish the surface defects. The arms and blade support pieces were then primed and painted with a good automotive laquer, then left to cure until the project is complete. Aircraft Stripper and a wire brush were used to strip the painted wiper arms to bare metal and polish the surface defects. The arms and blade support pieces were then primed and painted with a good automotive laquer, then left to cure until the project is complete.
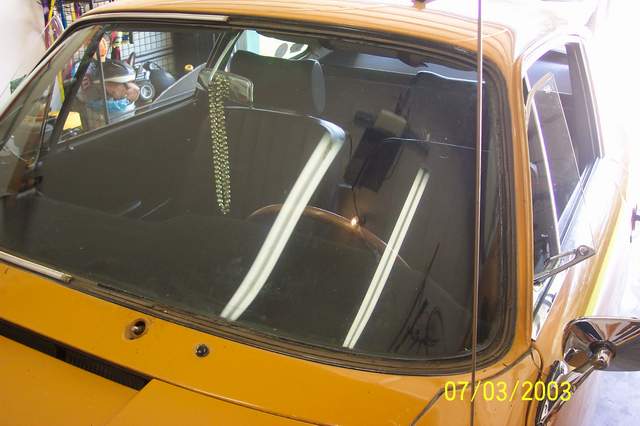
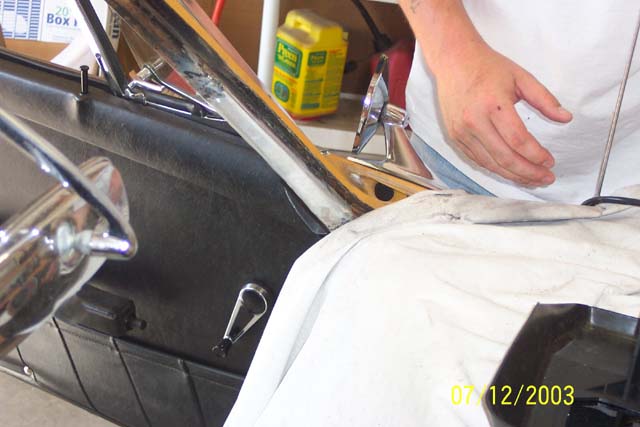
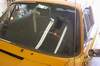
 Here we see a test fit of the wiper blades. The new dash pad is installed and the seal area has been thoroughly prepped and cleaned. All the rust has been attended to and the car is ready to receive the windscreen. Here we see a test fit of the wiper blades. The new dash pad is installed and the seal area has been thoroughly prepped and cleaned. All the rust has been attended to and the car is ready to receive the windscreen.
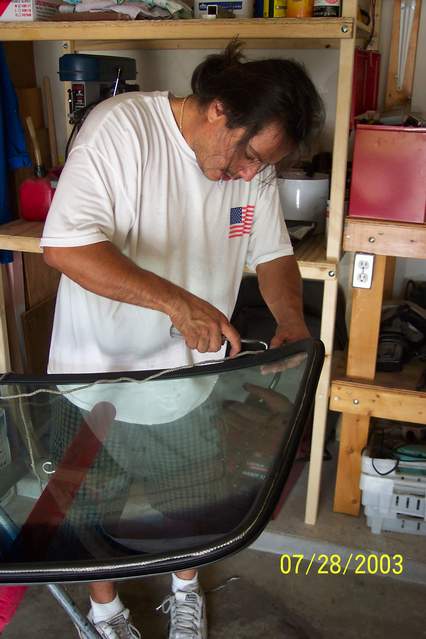
 Well, as you may have guessed, this isn't me. In the process of installing the aluminum trim into the old windshield, I applied unsupported downward force and managed to snap the glass vertically. Based on my experience with this costly and frustrating situation, I can't stress enough the need to properly support the glass at all times. The metal trim is difficult to install and requires patience and gentle coaxing to properly seat it in the rubber moulding. This must be done before installing the glass into the car. Well, as you may have guessed, this isn't me. In the process of installing the aluminum trim into the old windshield, I applied unsupported downward force and managed to snap the glass vertically. Based on my experience with this costly and frustrating situation, I can't stress enough the need to properly support the glass at all times. The metal trim is difficult to install and requires patience and gentle coaxing to properly seat it in the rubber moulding. This must be done before installing the glass into the car.
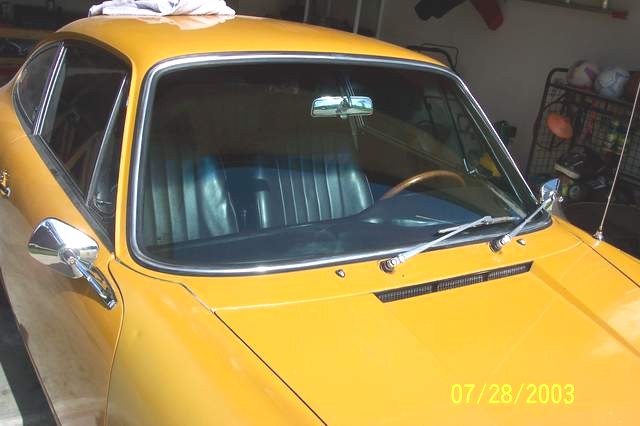
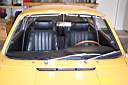
 Here we see the final product, new glass and all. The installer used the ususl method which involves placing a cord into the groove in the seal where the metal flange on the car sits. The framing was then coated with a liberal dose of soap water. Be sure to center the glass properly in the frame and gently pull the cord from inside the car to draw the seal over the lip. Here we see the final product, new glass and all. The installer used the ususl method which involves placing a cord into the groove in the seal where the metal flange on the car sits. The framing was then coated with a liberal dose of soap water. Be sure to center the glass properly in the frame and gently pull the cord from inside the car to draw the seal over the lip.
|